
Every February I confidently announce, “This year we’re keeping it simple,” and then I’m found at the kitchen table at 9pm, covered in glue, whispering, “Why won’t the googly eyes stay on?” If that sounds like your house too, you’re in the right place.
This DIY Punny Valentine’s Day Box is basically a little cardboard mailbox that collects cards and treats at school, but with one very important upgrade: it also shares jokes. Because if we’re going to craft, we may as well craft a laugh.
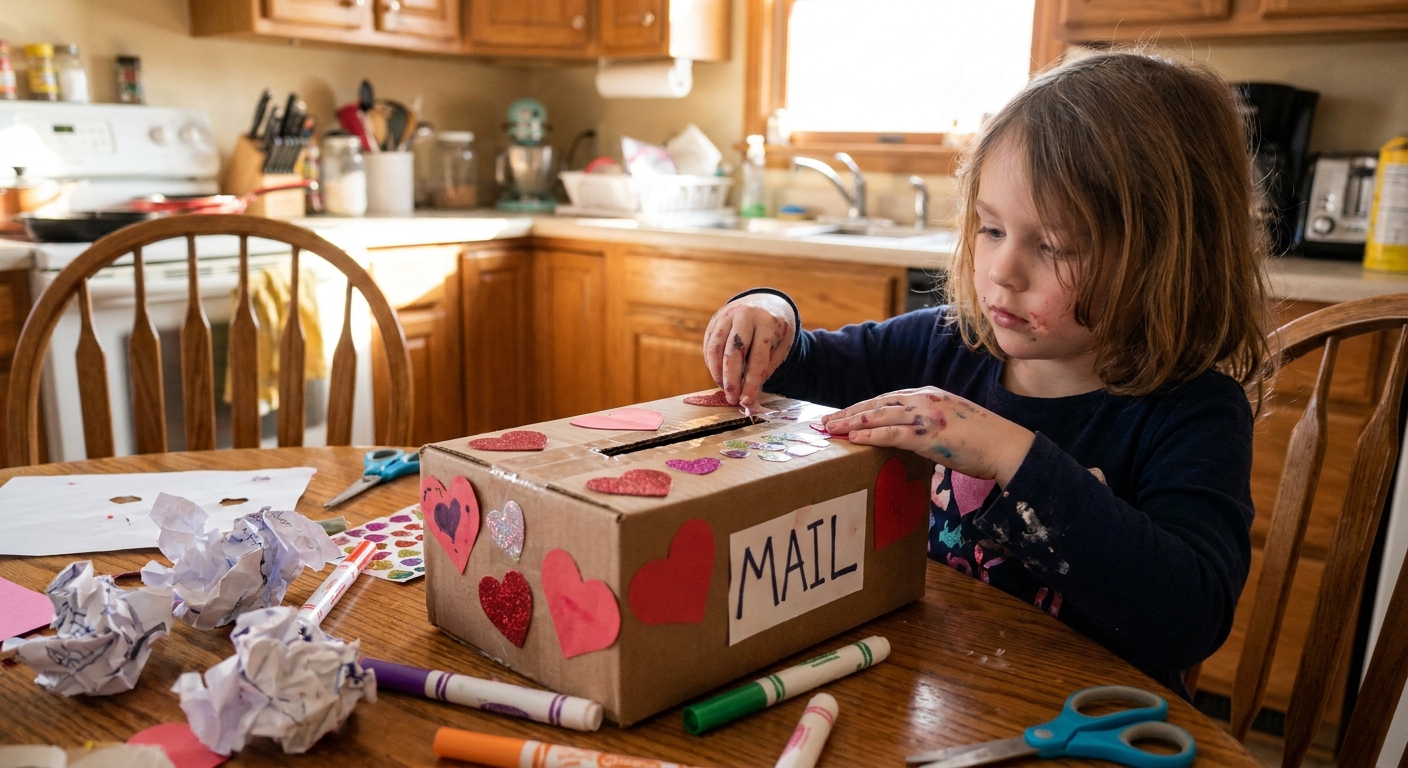
What you’ll make
A sturdy, kid-friendly “mailbox” style Valentine box made from a cereal box or small shipping box, decorated with hearts, bright colours, and punny joke panels. Classmates can pop their valentines and cards into the slot, and your child can lift a little joke flap to read a giggle.
It’s cute, it’s practical, and it’s secretly a comedy delivery service.
Supplies (mostly from the recycling bin)
- Cardboard box: cereal box, shoebox, or a small parcel box
- Coloured paper (red, pink, white) or wrapping paper
- Glue stick and/or PVA glue
- Tape (masking tape is brilliant for quick repairs)
- Scissors (and a craft knife for adults only)
- Marker pens or crayons
- Stickers, foam hearts, washi tape, sequins (optional, but children treat them like treasure)
- Googly eyes (optional, but I will always vote yes)
- Scrap card (for reinforcing and making joke flaps)
- Ribbon or pipe cleaners (optional for a handle)
- Optional closures: a small piece of Velcro (hook and loop) or a paperclip for the access door
Tip from the trenches: If the box feels flimsy, don’t fight it. Wrap the corners with tape first, then cover with paper. It’s like armour, but for crafts.
Quick glue note: Glue sticks and PVA glue are generally classroom-friendly choices, but if your school has a “no wet glue” preference, go heavy on the glue stick and tape.
Step-by-step: Valentine mailbox
1) Pick your box
Best classroom options:
- Shoebox: easiest, loads of room
- Cereal box: tall and slim, looks very “mailbox”
- Small shipping box: sturdy and already boxy
2) Cut the card slot (adult job)
On the top, draw a slot about 10 to 12 cm long and 1.5 to 2 cm wide. That fits many classroom valentines and small envelopes.
If your class does chunky, handmade cards, go a bit wider, around 2.5 to 3 cm. Nobody wants their beautiful card doing the awkward half-in, half-out thing.
Cereal box tip: Stand the box upright and treat one sealed end as the “roof.” That’s the end to cut the slot into.
Carefully cut it out with scissors or a craft knife. If your child is desperate to help, let them hold the ruler and feel very important.
3) Add an easy access door
You need a way to get the goodies out without shaking the box like a maraca.
- Shoebox: the lid is your access, easy.
- Cereal box: cut a flap door on the back (three sides cut, one side left as the “hinge”).
- Shipping box: use one of the existing flaps as a door. Make a simple tape hinge on one side (one strip inside, one strip outside), then use a small Velcro dot or paperclip to keep it closed.
Reinforce the door edges with tape so it survives the great playground stampede.
4) Wrap and decorate
Cover the box with coloured paper or wrapping paper. Glue sticks are less soggy than PVA, but a little tape on the inside corners is totally allowed. This is crafting, not the Olympics.
Add hearts, stripes, dots, stickers, and your child’s name on the front. If the school has a “no names” rule, skip it and decorate with a big character face instead.
5) Add a handle (optional)
Poke two small holes on the sides and thread ribbon through, tying knots inside. If you’re using pipe cleaners, twist two together for strength and thread them through holes like you would ribbon. Tape-only handles tend to quit the job right when your child is carrying it home like a trophy.
Joke flaps
This is my favourite bit because it turns the box into a tiny interactive joke machine.
How to make a flap
- Cut a rectangle of card about 8 cm x 5 cm.
- Fold the top edge over by about 1 cm to make a hinge.
- Glue only the hinge strip to the box so it opens like a little door.
- Write “Lift for a giggle!” on the flap.
- Underneath the flap, write the joke question and punchline.
Where to put them
- One big flap on the front
- Two smaller flaps on the sides
- A “secret joke” flap on the back for the teacher (brownie points, possibly)
Flap survival tip: Place flaps away from the slot and away from the access door edges. Those areas get grabbed, bumped, and “posted into” about a hundred times.
Smudge-proof tip: If you’re using marker, a strip of clear tape over the finished joke is like a tiny laminate. It keeps the punchline readable after a full day of enthusiastic fingers.
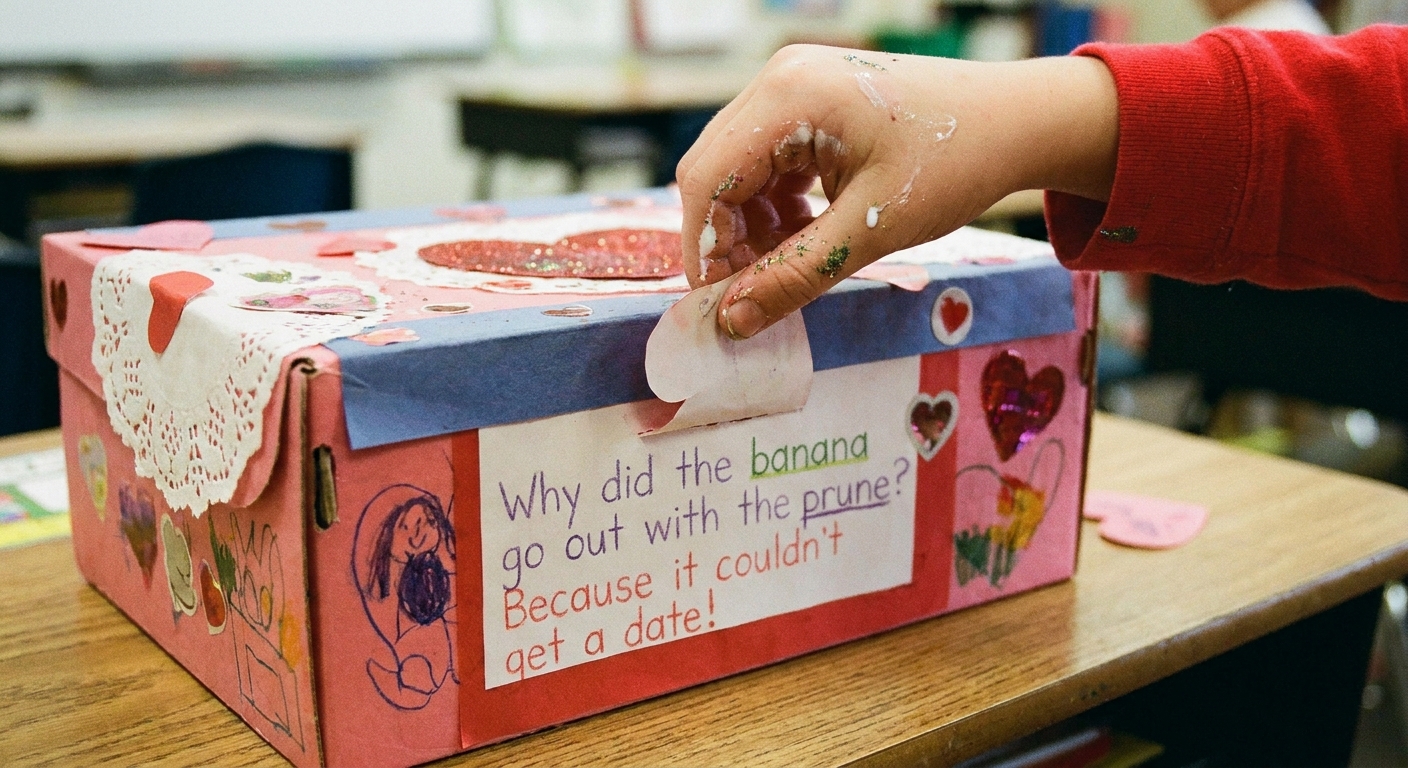
10 kid-friendly Valentine jokes
- What did one volcano say to the other? I lava you!
- What do you call two birds in love? Tweethearts!
- What did the stamp say to the envelope? I’m stuck on you!
- What did the calculator say to the pencil? You can count on me!
- What did one pickle say to the other? You mean a great dill to me!
- What did the paper clip say to the magnet? I find you very attractive!
- What did the cat say on Valentine’s Day? You’re purr-fect!
- What did the bee say to its Valentine? Bee mine!
- Why did the teddy bear say no to dessert? Because it was stuffed!
- What did the heart say to the other heart? You make my heart skip a beat!
If your kid loves knock-knock jokes, you can tuck a few into the flaps too. There are more giggles in our Kids Jokes guide.
Design ideas
1) Love Bug
Cover the box in red, add spots, and stick on googly eyes. The slot becomes the bug’s “mouth.”
2) Punny Postbox
Go classic mailbox style: a big front label that says “Happy Mail”, and joke flaps labelled like stamps.
3) Monster of Love
Make a silly monster face and line the slot with paper “teeth.” The valentines get “chomped” safely inside. If your kids like monsters, you’ll probably also like our Feed the Monster game.
4) Fortune Valentine
Add one flap that reveals a “fortune” style joke or compliment. For more fortune-style fun, try paper fortune cookies with joke fortunes.
Classroom tips
- Check school rules first. Some classes have “no sweets” rules or allergy policies (especially around nuts and shared treats). If treats are a no-go, this box is still perfect for cards and little notes.
- Keep decorations flat-ish. Puffy bits look amazing for five minutes, then get snagged on jumpers.
- Reinforce the slot. Tape around it so repeated posting does not tear the cardboard.
- Skip loose glitter. I love sparkle, but teachers love not vacuuming sparkle.
- Make it easy to open. A back flap with a single piece of tape as a “seal” works great, or Velcro if you have it.
- Do a quick shake test. If something falls off now, it will definitely fall off in a busy classroom.
Safety notes
- Adults should do any cutting with a craft knife.
- If your child is under 3, avoid small embellishments like sequins and tiny pom poms.
- If allergies are a concern, skip scented pens, scented stickers, or anything strongly perfumed.
30-minute plan
- 5 minutes: pick box, tape weak spots
- 5 minutes: cut slot and back door
- 10 minutes: wrap in paper
- 10 minutes: decorate and add 1 to 3 joke flaps
If you have more time, go wild. If you don’t, the box will still be adorable and functional. Honestly, “functional” is a February miracle.
Quick FAQ
What size slot works best?
A slot around 10 to 12 cm long and 1.5 to 2 cm wide fits many classroom valentines and small envelopes. If your class swaps thicker handmade cards, go wider, around 2.5 to 3 cm.
How do I stop the box collapsing?
Use a sturdier box if you can, then reinforce inside corners with tape. If the box is tall and top-heavy, pop a little scrunched paper or spare cardboard in the bottom for stability.
What if my child wants it to look perfect?
I tell mine the same thing I tell myself: “It’s not a museum piece, it’s a joy box.” Cover wobbly bits with a heart sticker and call it design.