

Rainy afternoon in Yorkshire, three kids bouncing off the sofa, and me thinking, “Right. We need something that feels like a game… but is secretly a craft.” That is exactly where the DIY Joke Generator Spinner Wheel shines. It is a cardboard spinning wheel with a clicky little pointer that chooses what kind of joke you have to tell, or which goofy blank you have to fill. The best part is that it looks impressive, but it is basically cereal-box engineering.
Time: 20 to 40 minutes (longer if someone insists on decorating every wedge like it is the Olympics).
Ages: Best for ages 5+ with adult help for cutting and pokey bits. Split pins, brads, and paperclips are a choking hazard, so keep them away from under-3s.
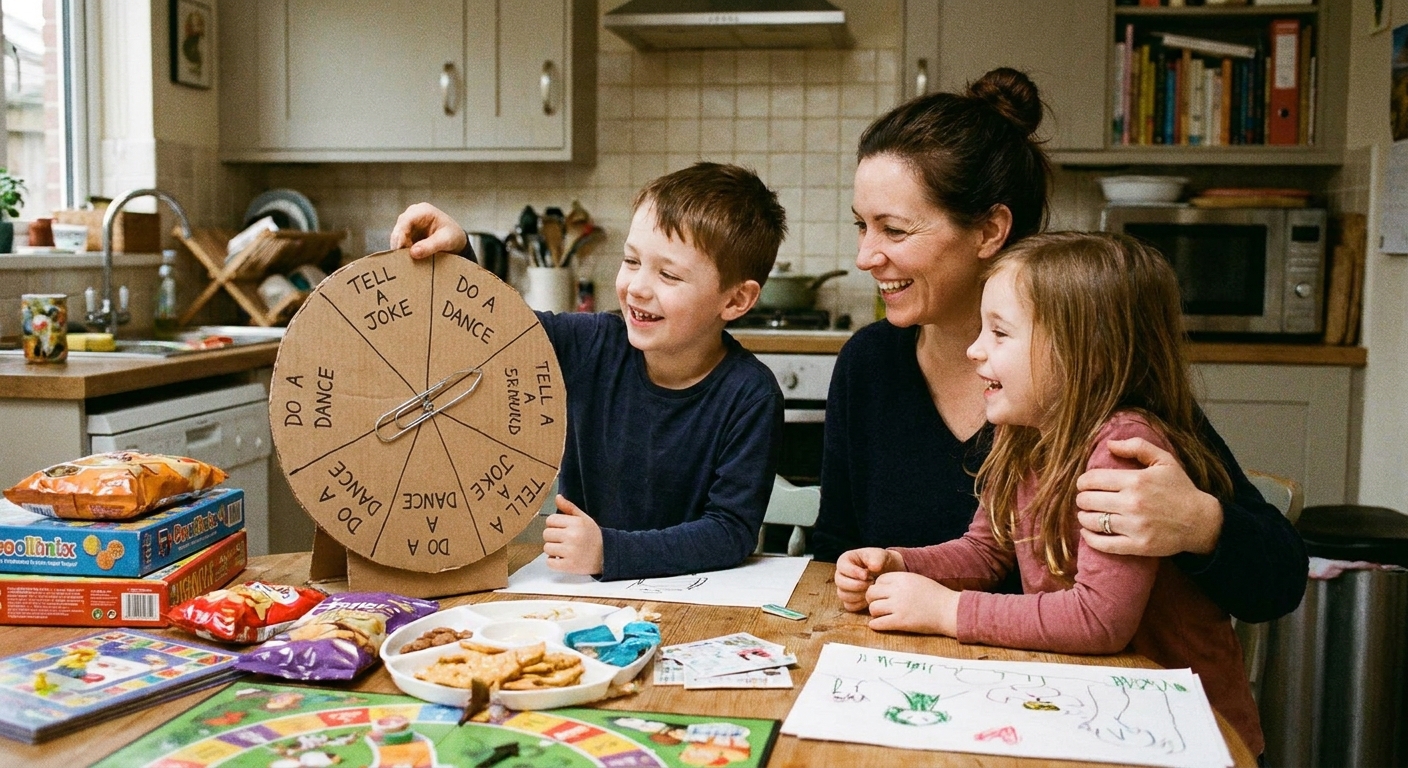
What you are making
A round spinner wheel made from cardboard, fixed with a split pin (brad) so it spins smoothly. You can set it up in two fun ways:
- Joke categories: “Knock-knock”, “Animals”, “Food”, “School”, “What am I?” and so on.
- Fill-in-the-blank punchlines: Spin for a prompt like “Why did the _____ cross the road?” then spin again for a random word like “banana”.
Either way, it turns “tell a joke” into a proper game with suspense, drama, and occasional complaints of “It landed on fart jokes again!”
Supplies
- Cardboard from a cereal box or delivery box (the flatter, the better)
- Scissors (and a craft knife for grown-ups only, optional)
- A split pin (also called a brad paper fastener)
- Marker pens or crayons
- A plate, coin, or jar lid (for tracing circles)
- Paperclip (optional, for a clicky pointer)
- Glue or tape
- Ruler (optional, but helpful for dividing sections)
- Skewer, nail, or pointy pencil (optional, for making a clean centre hole)
No split pin? You can improvise with a small nut and bolt, or even a toothpick through the centre plus a tiny cardboard “stopper” on the back. A split pin is easiest though and usually lives in that drawer where all the mystery keys are.
Build the spinner
Before you start, pick your style. There are two simple builds, and they look similar once they are done:
- Build A: A spinning wheel with a fixed edge clicker (the wheel spins, the pointer stays put).
- Build B: A centre-mounted arrow that spins over a fixed wheel (the pointer spins, the wheel stays put).
1) Cut two circles
Trace a large circle on cardboard (about dinner-plate size is lovely, but anything from 15 cm to 30 cm works). Cut it out. Then cut a second circle the same size. Two layers makes it sturdier and helps it spin flatter.
Glue the circles together and press under a book for a minute while you gather the next bits.
2) Find the centre
Fold your circle gently in half (do not crease like you are angry at it), then in half again. Unfold and you will see two crossing lines. Where they cross is your centre point.
3) Divide into sections
Choose 8 or 12 sections for a satisfying spin. Use a ruler to draw wedge shapes from the centre outward. Do not stress about perfection. Wobbly wedges are part of the charm.
4) Label your wheel
Write a category or a prompt in each wedge. If you are doing the two-spin version (prompt wheel plus word wheel), make two separate wheels and label one with prompts and the other with silly nouns.
5) Add colour
Colour each wedge a different colour. This makes it easier for kids to read at a glance, and it also makes your wheel look like it means business.
6) Make the pointer
Choose one option.
- Build A: Fixed edge clicker pointer (wheel spins)
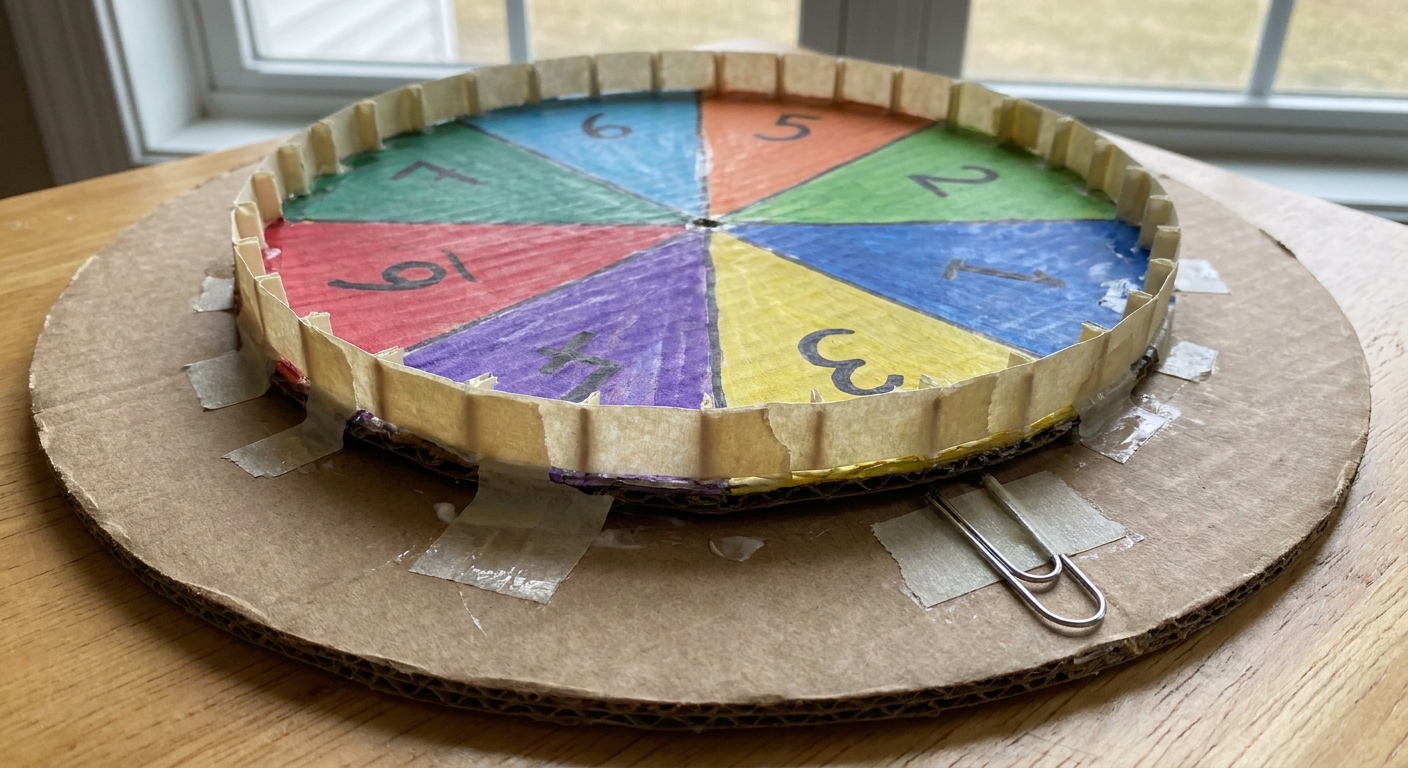
Unbend a paperclip into a V shape. Tape one end down to a separate cardboard base (or a larger “platform” piece), and let the other end spring lightly against the wheel edge.
For an actual click-click, give it something to bump over: add small tape ridges along the rim, cut tiny notches, or glue on a few little folded paper tabs at the wedge lines. - Build B: Centre-mounted arrow pointer (pointer spins)
Cut an arrow from cardboard, about 10 to 12 cm long. Punch a hole at the blunt end. This arrow will spin around the centre over your wheel.
7) Add the split pin
Make a clean hole through the centre. A quick poke with a skewer or pointy pencil first helps, then widen it just enough for the split pin.
- If you are doing Build A (wheel spins): push the split pin through the wheel and into your base. Open the legs on the back. Do not clamp it too tight. The secret to a good spin is leaving it just loose enough to rotate freely. If the wheel rubs on the base, add a tiny cardboard “washer” around the pin between the wheel and the base.
- If you are doing Build B (pointer spins): push the split pin through the pointer arrow and the wheel. Open the legs on the back, again not too tight. If it feels sticky, add a tiny cardboard washer between the arrow and the wheel.
8) Test and tweak
Give it a spin.
- If it scrapes, trim any rough edges.
- If it spins like a sleepy potato, loosen the split pin slightly.
- If it wobbles, add a second washer or use a thicker base layer.
What to put on the wheel
Option A: Categories
- Knock-knock
- Animals
- Food
- School
- Puns
- Riddles
- “Why did the…”
- Silly voices (tell any joke in a robot or pirate voice)
Option B: Two-spin jokes
Wheel 1: Prompts
- Why did the _____ cross the road?
- What do you call a _____ that _____?
- Knock, knock. Who is there? _____.
- What did the _____ say to the _____?
- I tried to _____, but my _____ _____.
- My teacher said _____, so I _____.
- At the zoo I saw a _____ doing _____.
- Today I met a _____ with a _____.
Wheel 2: Random words
- banana
- penguin
- toaster
- grandma
- spaghetti
- unicorn
- smelly sock
- hedgehog
- marshmallow
- robot
- sandwich
- cupcake
Then you spin prompt + spin word, and everyone has to commit to whatever nonsense appears. Comedy gold. Occasionally literal gold if your child is eating biscuits while laughing.
How to play
- Classic mode: Spin and tell a joke in that category. If you cannot think of one, you have to do a dramatic “boo!” bow and pass the spin along.
- Family points mode: 1 point for a joke, 2 points if it makes someone laugh, 3 points if it makes a sibling laugh (the rarest creature).
- Speed round: You have 10 seconds to start your joke. If you freeze, you must tell your best fake-laugh and try again next turn.
- Kind mode: Everyone claps after each attempt, because we are raising comedians, not hecklers.
If your house enjoys structured silliness, pair it with a simple joke-collecting activity first. My kids love anything that feels like a “secret stash”, like the Family Joke Jar Craft, then we pull ideas from it when the wheel lands on a tricky category.
Make it sturdier
- Tape “lamination”: Cover the top with clear tape strips to protect the writing from sticky fingers.
- Add a base: Glue the wheel onto a larger square of cardboard so it has a platform and the fixed pointer (Build A) can be taped down properly.
- Edge reinforcement: Wrap the edge with masking tape to stop fraying.
- Storage trick: Slide it behind a bookshelf or under the sofa like a giant pizza box. Very professional. Extremely normal.
Safety notes
- Craft knife use is for adults only.
- Split pins, brads, and paperclips are pokey and a choking hazard. Supervise closely and keep spare fasteners out of reach.
- If you use tape on the top, press down edges well so nobody picks at it and eats a mysterious plastic strip. Kids are inventive.
Troubleshooting
It does not spin well
- Loosen the split pin slightly.
- Make the centre hole cleaner (poke first with a skewer, then fit the pin).
- Add a small cardboard washer where there is rubbing: between wheel and base (Build A) or between pointer and wheel (Build B).
- Trim any lumps where the cardboard overlaps.
The pointer flops around
- Use thicker cardboard for the pointer.
- Shorten it a little so it is not too heavy.
- If you are doing Build B, glue two arrow pieces together for stiffness.
Kids cannot read the wedges
- Use fewer sections (8 instead of 12).
- Write in big block letters and keep labels short.
- Use simple icons like a paw print for animals or an apple for school.
Try this next
If your kids enjoy anything that flips, spins, or reveals a surprise, you might also like:
- Origami Joke Teller: Folding Guide and 40 Funny Prompts
- Funny Thaumatropes: Spinning Illusions With Punchlines
- Kids Crafts Guide for more low-supply projects
Quick joke starters
- What do you call cheese that is not yours? Nacho cheese.
- Why did the teddy bear say no to dessert? Because it was stuffed.
- What did one wall say to the other wall? I will meet you at the corner.
- Why did the banana go to the doctor? Because it was not peeling well.
- What do you call a sleeping bull? A bulldozer.
And remember, the real win is not perfect jokes. It is everyone getting involved, even the kid who insists their punchline is just “POO” and then laughs like they invented comedy.